Showing posts with label sewing. Show all posts

Monday, July 16, 2012

My 1 hour skirt

If you remember a couple weeks ago I picked up some amazing vintage fabric over at Wholly Craft. I finally had the time to turn it into a skirt. Super easy and took only one hour. (please excuse the mess, my guest room has also turned into my sewing room and craft, and well general junk magazine stash room)

The fabric had a high stretch content on the weft and it was a polyester 120" wide (60" when folded).  I measured out my length for the skirt and then cut it across.


After unfolding it this was the width and my waistband. Luckily with the stretch on this fabric and thickness I was able to use the waistband without elastic.  I just needed to account for the stretch so I made it 2" smaller then my waist measurement. It was perfect.

To bring the fabric into a more manageable length I used my ruffler foot to assist me in the gathering.

I had it set to ruffle every 6 stitches.

After everything was ruffles it was about half the width but still not enough to comfortably set it into the waistband. At this point the seams were also sewn up so that they could be included into the ruffled gathers without it looking awkward.

With a contrasting thread I put in a basting stitch and then pulled the last of the gathering to make it fit into the waistband.

With everything pinned into place it was time to sew the skirt and waistband to each other.

With this type of polyester fabric there were no problems with everything unraveling so I didn't feel the need to serge the fabric and the waistband I had picked was a simple fold over straight style in two pieces. I didn't need side seams but I wanted them to be in there for extra support against the fabric stretching too much.

Carefully sewing the skirt and waistband together I find it easier if the flat waistband is on the bottom and the gathered skirt is on top so you can watch that nothing gets twisted or overly gathered in places.

Sewing with a stretch style waistband you also have to remember to use a stretch stitch and not a straight stitch or else the stitches will break when you stretch it to put it on.

You must be very careful to not sew over pins or sew them in and forget to take them out. It is an easy mistake to make when dealing with so much fabric.


The finished skirt before the hem. I decided to do an easy 1/2" top stitch hem and not worry about the stretch since there was so much fabric for the skirt I had no worries about torn stitches in the hem.


Ta Da! All done and ready to wear out.  

What have you been sewing lately? Is there a super fast and easy project that you are proud of?  Just because it's fast doesn't mean it isn't good or well crafted as long as you get the results that you wanted.
Cheers!

Tuesday, May 22, 2012

Carry me - Book Review

 I'd been battling back and forth if this book would be worth it to get and finally just found it through my local library. My library is amazing that it connects to about 100 or more others so if they don't have it someone else can send it to my branch. Anyways back to this book. From the cover I could tell this was clearly a Japanese translation, their books just have this certain clean look about them. As much as I like Amy Butler's books and all their pretty colors it can also get me distracted from working on the project at hand. This book was also suggested by Interweave magazine so I thought it would be a worth a gander.

As expected from a Japanese craft book, even though it is translated it still has all the exact some clean beautiful photos. The detail photos are always important to me to see the pockets and notions used to make it complete.

I was very intrigued with this bag and it's multiple rivet's. In another picture it shows how the smaller bag clips inside the larger one with the rivets and some alternative strap and accessory attachments using the rivets as well.

Per the style of Japanese craft books all the pretty pictures are at the front and the meat and bones of the making is at the back of the book with a small picture of the project.  The instructions were very clean and direct with some nice illustrations to help understand where you are at.

 This book is perfect for someone who wants everything exactly step by step handed to them but a bit dry for the more creative person since it is very word heavy and all the illustrations are in black and white. But that is only half the book, the first half is still all the pretty pictures to inspire you.

Another nice thing is that all the patterns for the bags are included with the book. The Translated version is a bit different then how I am used to seeing them in the Japanese Craft books. Usually the patterns are all crammed into one sheet only identifiable by their different types of lines (dashes, dots, diamonds, circles, etc) and turned every which way. But in this translated version everything is laid out nicely such as a typical garment pattern would be laid out.

Over all I think this is a great book but if you follow them for materials you might have a tough time. Some of the bags require special notions that you can't just run down to Joanne's and get. These bags are also very nice and well made from good materials so if you want to do the exact project step by step plan ahead to be ordering some things online and that it might be just as costly in materials as it would be to buy a bag on your own. I think that can be said with a lot of nicer sewing projects though.

Not a keeper for me but I will be checking it out from the Library again so I can make the square bag and perhaps the rivet bag for my own personal uses.

Wednesday, May 16, 2012

Fringed Skirt - DIY

I saw this in Lucky and was inspired to make my own over the weekend. Although the materials are supposed to leather and glass beads I used what I had, T-shirts sitting for disposal from the house.

Thankfully my hubby and I are of completely different sizes. His old t-shirts were just the right amount of fabric to make my fringe skirt.

I cut each one in half so that I would have room on the front and back. Also if you have ever worked with t-shirts before the best roll is when you cut them across horizontally in strips.  I divided it vertically first so that I can cut my pieces horizontally for the fringe.

I measured out and cut with a rotary cutter 1" wide stripes leaving 1" at the top for me to be able to sew it to the skirt base. This also keeps the fringe from stretching too far up and tearing itself apart.

After all the pieces are cut I stretch each individual strip to give it both length and let it roll itself into thinner strips.

You can see the difference here between stretched and unstretched fringe.

With all the fringe stretched I am ready to sew it onto my skirt base.
The skirt base I used was a simple pencil skirt with a high stretch on the horizontal.

I sewed the first top fringe color on first so that I could judge the placement of the others as I worked down. I attached it with a top stitch since that would easiest to work with.

Remember when you are sewing with stretch you want to use a stretch friendly stitch such as a zigzag stitch. This will allow the fabric to freely stretch with the fabric without breaking the stitch.

I lay out the second tier of fringe under the seam line about an inch and make it with chalk so I can see it while sewing.


Sewing the fringe onto a pre-made skirt can be tricky and you want to be careful when pinning things on stretch fabric because they will want to move.  I didn't do it here but I suggest using a walking foot when working with stretch. Otherwise the bottom feeder feet will put more tension on the bottom and stretch the fabric more then the top.


I followed the same steps with the third and last tier.

When you get this far it can get a little complicated so make sure to keep all the other fringe tiers out of the way of your sewing. A good tip is to pin them up or even pin another piece of fabric over them to keep them out of the way.

My finished skirt! I would show you a full photos but when I sew, let's just say it's not the most fashionable things I wear. I'll do an Outfit of the Day soon showing off my new skirt.

Thursday, April 05, 2012

Burday Style - OOTD

After having completed some major projects I feel a little bit in a slump.  I have another three lined up that I am brainstorming on but I'm finding it hard to put them into process. I decided I would take this doldrum to explore a few things I have been interested in.  One of which has been sewing using one of the new Burda Style patterns from their online site. The idea of having all these cheap patterns on hand seems great for the avid or recreational seamstress. I went for a $2.50 Pattern called the Linda skirt.  Simple A-line that is always classic, although I have my own pattern for this I thought it would be interesting to test the print at home abilities and their sizing for patterns.

28 pages printed later I have this.
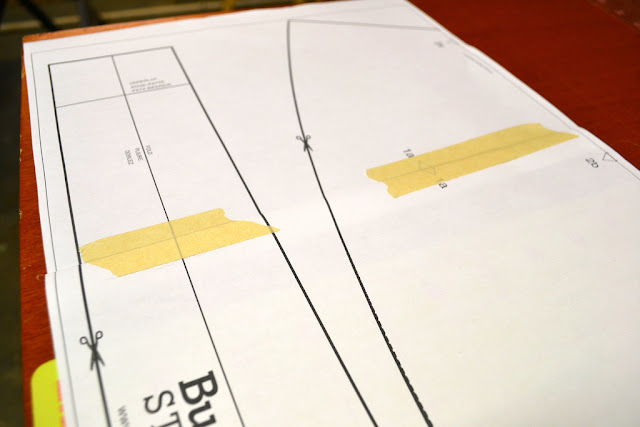
Which will need to look like below after being taped together for it to work.


I begin taping pieces together only where it is necessary.  Working on it row by row and using my pattern weights to hold the pieces together and straight. It shows to cut off the extra slivers of paper between the pattern pieces but I don't want to waste time doing that, so I folded them down and make the edges crisp with a bone folder.

As you can see now everything matches up perfectly.  Luckily the seam allowance of 5/8" is already included so there is a little room for error in the pattern.

Piece by piece I think this actually took longer then the sewing of the skirt itself.  If you got off on one part it would set every part after that off skew by an increasing amount.  There was much cursing and repositioning.  If you do this, please use a low residue tape at first and then you can secure it down later, though I doubt many people would use the same pattern more then once unless they transferred it to butcher block paper.

I think it took me about an hour to get this all completed before you have to now cute it all apart.  Seems a little pointless I know but this is how patterns work. Repetition and a lot of prep time to make sure the end product is done just right.  My only mishap was in the far left bottom where you can see the "burda style" logo is a square that I didn't measure.  It is supposed to be a 4x4" square and if it is not then you need to adjust your pattern or grade it. Apparently my square was too small because the entire pattern was 7" too small. This I did not know till later when I cut out the fabric pieces.

Anyways if you were smart enough to measure the square and not ignore it such as I did after the adjustments was cutting it out.  Each dotted line represented a different size, which is always nice to see the grading changes.

Honestly at this point sewing was the easy thing for me.  It called for a folded waist band and top stitch seam but of course I like to make things more difficult for myself and did a stitch in the ditch seam for the waistband.

I love the clean look of a stitch in the ditch waistband seam. When a skirt can be so simple it's nice to add in that extra touch of tailoring that most likely no one else will see but you know it's quality.

My fix of the skirt being too small was adding in 4" panels to each side seam and luckily I had not cut out my waist band so I made the pattern adjustments before cutting that from the fabric.  Adding the panels put in more fullness to my skirt and I clearly am a lot shorter then the model in the photo.  Their skirt hits her right below the knees where my version ended up touching the tops of my ankles.
Just another reminder to check your pattern lengths against you body before you commit to your final fabric.

 
Skirt - DIY from Linda pattern on Burda Style with Ikea upholestry fabric
Pop Killer Geisha T-shirt - Pop Killer in LA Little Tokyo
Green Cardigan- Express
Gold Chunky platforms - BCBGeneration