Showing posts with label jet pens. Show all posts

Wednesday, April 17, 2013

Crewel Tool kit

Currently I have been working a lot in crewel embroidery. Mostly french knots and bullion stitch to describe wounds in my fine art work. It is most definitely a labor of love because the work is so tiny yet so many hours go into each piece. I hope that it will translate well when I have my group exhibition in October at the Ohio Art League gallery.


Anyways it got me to looking at my tool kit and also a nudge from a friend about an embroidery toolkit contest going on in the UK. I thought why not. If she thought it was interesting enough to suggest I might as well share it.

&Stitches tool kit competition
So here it is:

In my kit starting at twelve O'clock going clockwise:
  • My appleton crewel threads hoop, which I made
  • Clover embroidery hoop stand
  • Embroidery pocket guide
  • Clover embroidery hoop
  • Thread heaven
  • Embroidery scissors
  • Thread snip ring by clover
  • Needle pull pads
  • Paper piecing hexagons
  • Thread
  • Seam rippers
  • Eraser, pencil, post it notes
  • Felted Wool ball pincushion
  • Magnet to catch stray pins
  • Clover embroidery needle threader
Below are a few more in detail shots of everything.


My little magnet pin holder inside the metal tin. It works pretty perfect while I am on the go because i know any loose pins inside the tin will find their way to the magnet so it's not an explosion of pain every time I open it.

My wonderful little collection of cutters.
The favorite is my green pen scissors. They are tiny and fit on my cell phone or in my pocket and have been tested to be airplane safe so far. the ends are a bit rounded which is why I think they have been approved so many times. I got these little wonders off of Jetpens.com
So that covers what is in my embroidery kit!

It was also a nice exercise to get everything reorganized. There is a lot of organizing going on in my life right now with the move out of my studio and back home and prepping for summer and all the festivals and events at work. My biggest challenge is the balance between working on my fine art and working on my fashion for the summer show with the Alternative Fashion Mob.

I was very proud of myself for putting out some of my fine art watercolors at the last AGORA X this past weekend. All three pieces were sold to the same person and he really liked them. It was a sort of unbelievable moment for me because I've only ever sold fashion or craft work and never fine art work. I might of blurted out in his face an enthusiastic "REALLY?!"
Oh silly me and my tactfulness.

 
Sold bruise studies #1-3

Well I hope you all have a good week and I'll try to think of something fun for next week's post!
Cheers!

Tuesday, February 22, 2011

My Adventures with a Coin Purse Frame

During one of my recent and naughty spending trips to 
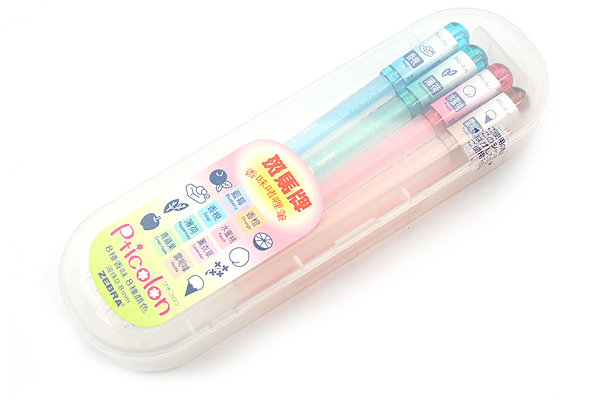
Sew to Speak I saw they had these cute Japanese Coin Purse frames on sale that I had been eying for a bit.  I went ahead a picked up two.  Also recently I had lost my precious pencil case that I keep in my purse with my favorite
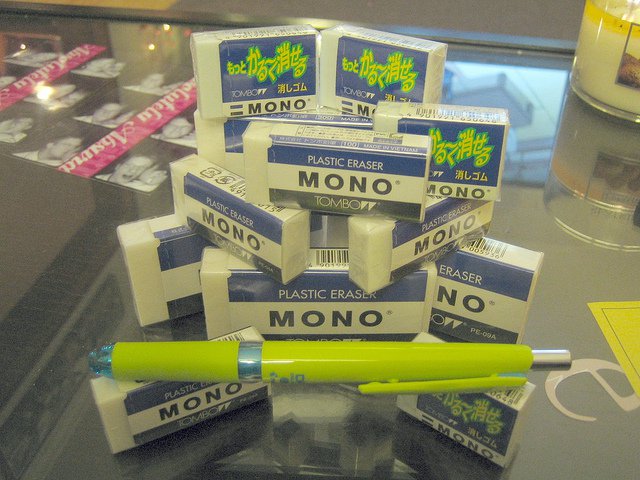
 Frixion pens and Delful knock mechanical pencil (total sad face).  I thought I would take the opportunity to make myself a new pencil case and get creative with the coin purse Frame.  Now I will take you on a pictorial journey of my adventure (and yes it was a grand adventure) of me and this Japanese coin purse Frame.

As soon as I opened the package I cut out the pattern without even a second thought that I had no idea why there were only two pieces that looked totally different.  I recognized the larger piece as the main pattern but this smaller one was a mystery.  I idled away the time by scratching my head and snapping the frame open and close trying to pretend I could read Japanese. 

Then it dawned on me that there was a tutorial on The Purl Bee somewhere.  After several failed word searches I finally came across it, but low... their pattern was different as well.  The one good and similar thing was that the mystery pattern piece was explained.  It was a facing that you make out of thicker craft paper and glue into the lining, at first you think why not use regular iron in facing.  These Japanese folks are smart.... I'll get to that later.

Next was cutting out my exterior fabric and lining.  I nearly made the same mistake as the Purl Bee tutorial in that I picked out two heavy weight fabrics for the exterior and lining.  Being the smart person I am I read ahead and quickly switched out my lining fabric to something much lighter weight before cutting.  Since it started with a little coin purse, I measured out and left an extra inch longer then my standard pen/pencil.  I then split the pattern to elongate it and BLAM-O pencil case it was.

 Ok and here is the part that seemed funny but turns out the Japanese are really smart.  For the facing it is telling you to use a brown craft paper (or a paper grocery bag works) to cut out these small pieces.  Then you Glue them to the lining fabric.  It seems odd but when you have to stuff that fabric into the frame it makes it worlds easier.  I like to use fabri-tac, it reminds me of hot glue but without the burning when I touch it by accident and I can still wipe and peel it off all the same.  It does a really good job at adhering to fabric also.

Here is my little baggie sewn together (honestly the sewing is probably the easiest part.  I stuffed the lining into the outer fabric and dropped a few small weights and shook it around to make sure the lining fabric was completely spread out.  Then basted the two pieces together all along the top.  I intentionally made my basting go outside the parameters of the frame because I didn't want to add extra bulk when shoving and I wanted to be able to tear them out after wards.

An inside view and you can see how I pinned the excess fabric so that I can more easily (assumingly) slide the fabric into the frame.

This is right before I spread the glue into the first half of the frame and attempted my sliding technique.  In reality there was no sliding just stuffing and cursing and getting glue all over myself, followed by more glue when I had to stuff in the paper cord. Around then more cursing to finish it off.

This is how it looked after the first stuffing and before I cut off my excess paper cord.
The steps were
1. put glue into the frame
2. Slide/Stuff the fabric into the frame
3. Curse a bunch and potentially wipe glue on passer by's such as kitties and fiancee's
4. Add more glue while trying not to pull out the fabric you just shoved in there
5. Curse more and try to keep stuffing it in
6. Stuff the paper cord in while continuing to curse and get glue all over yourself.

Now they tell you you can stuff it all in with an awl or tracer (another pointy metal device).  I used a small flat head screwdriver and by gosh I'm happy I did.  Using a flat head gave me a much faster result at getting all that junk in the trunk aka fabric to frame.  My other trick is while stuffing the first side I pinned back the half that I wasn't using to keep it out of the line of fire.


In these two pictures above and below you can see some closeup of why I was cursing, from stabbing myself with my pins to getting glue generally all over the frame and me.


After all is said and done you need to clamp it down!  This is the tricky part.  You need to use pliers and wrap the frame with scrap fabric so that while you clamp you don't put teeth marks in your frame.  You need to clamp is HARD since there is a lot of bulk you just put into that tiny space and glue.  This is where it is tricky, you need to be mindful while clamping it not to totally bend the frame and also if your pliers have a cutting edge not to cut your frame (I didn't cut all the way through but it sure did leave a mark).  I also used a combination of my rubber mallet when I found that I did mess up the shape and that it would clasp itself closed.

 This is my happy awkwardly shaped product.  I thought I would get really making these.  Not so much.  I will have to make one more just because I bought two frames.  But you know what? it does the job and it looks cute.  Plenty of lessons learned.
Cheers!

Tuesday, January 25, 2011

Pen Obsession

I have this bad obsession with pens.  I used to collect them in every style and every color whenever I would visit Korea or in Japan during my layover on my way to and from Korea.  It started off innocent enough where I would buy a little box set of marbled or scented gel rollerball pens.


Photo from Jetpens

At this time I was also collecting Stickers and Stationary.  I think it was left over habits from before the days when everyone was connected and had e.mail.  I remember in middle school and even high school having a steady supply of these things and writing letters to friends.  That was justifiable back then.  Now it is simply an obsession with color, design and tactile feel.  It is extremely pleasing to me to hold a handful of the same pen in every color combination and look at it with my thoughts racing of the possibilities of things I could write or draw.  I have a personal journal that I keep outside of everything where I write in it with all different color pens and also keep scraps, memento's and such in it.  That barely justifies the amount of pens I have unfortunately.  I won a contest from my favorite pen store Jet Pens last year which was awesome but also slightly embarassing as it was directly related to my obsession with pens.

This Photo is what won me my gift card.

I have found a little bit more of justification for the pens, I need them to sketch! and to add color to my design work since I don't believe in full color just hints to get the feel of what it should be.  Some of the pens are also awesome for keeping track of which patterns go together by writing them in corresponding colors.  I have been good and not needed to get a matching mechanical pencil with every pen (that's something I used to do all the time).  Lately it's mostly pens and then I'll select a single glorious pencil or eraser once in a while.

My most recent Mechanical pencol was the Delful.
Which you see nestled here amongst my stock up of erasers (because they are no longer going to be able to import them).  This pen is unique due to it's weight and smooth feeling.  It is what is referred to as a "knock" pencil.  There is a weight on the inside so instead of pumping the clicker on top you simple shake the pencil to advance the lead.  This "knock" feature is my favorite while I am working on patterns because I can seamlessly keep working without being frustrated clicking the pen and moving my hand position.

But out of gluttony I just recieved these beauties in the mail. 


I am absolutely in love with the Frixxon markers and pens.  They have a unique ink that disappears with friction/heat and then will reappear in the cold (real cold like a freezer).  They are one of the few erasable pens that actually do erase with barely to no marks (depending how heavy your hand is on the paper with imprints).   I like to use them on my muslins since the ink also writes well on fabrics.  It's fun to watch it steam off but I still need to test if they are usable as replacement marking pens because if someone were to wear a garment in winter and all the notation show up again that would be unfortunate.  Or possibly really cool, like hypercolor t-shirts but not so cheesy.

Aren't they so pretty? ~droool~