Friday, March 18, 2011

Making my Camera Bag

Also known as the seven levels of sewing Hell!  I like how a lot of my larger sewing tutorials lately have been less then encouraging but it's the truth, some of this stuff is HARD.  I'm not at all trying to be discouraging but perhaps through me you can see the effort that it takes for people to actually craft these things.  Next time you wonder why that bag is costing you over $100, I hope you can fondly look back at my post and remember just how much expertise does go into it.

Just fair warning this is a DOOZY of a post so it is very picture heavy and long.  I completed it over a course of about 4 days 4-5 hours each, lot's of head scratching and bad techno with kitties for company.

I took my idea for this coming from this Etsy Seller : Stash and the bag Below.

Photo from Mariforssale

It seemed simple enoug, rectangular bagwith padding built into it for protection of my precious camera.  Fun wool fabric to make it stand out and look more classy then your normal bag.  Wow was I ever wrong.  the functionality of any bag is to have pockets, lot's of pockets.  Especially since this would potentially be a lap top bag and purse all in one along with the camera bag.  I wanted it to be as small as possible with lot's of functionality to serve all these purposes at once.  To keep clutter down a vast range of pockets was needed.
This was the picture for the innards of the Stash Bag I was re-creating for myself
Photo from Mariforssale 


These are my raw materials before I started, some gorgeous green and brown wool plaid, matching olive green duck cloth and a olive green leather for my bottom (that was my addition to make it a little more classy looking and protect the bottom)  The pattern was pretty simple I only used 4 pieces, two sides, the majority of the body and then the flap.  I used these also to make the pockets

After cutting my pieces to their appropriate sizes with seam allowance I instantly needed to face all the wool because it is much lighter in contrast tot he duck cloth.  I used a single sided fusible iron on facing in the exact size of the pattern which in retrospect for stability I should have made the facing the entire amount of the fabric. 

Facing and putting together the pockets so that they are seamed into all the sides for more stability and to give it a more clean look on the inside.


After the interior is sewing up with the velcro in place for the extra padding of my camera case.
Working on the exterior pockets I had to face the wool again and put the duck cloth in as lining to give it a sturdiness and longer wear.  The Duck cloth also has practically not stretch or give so it is perfect to help keep the shape of the pockets no matter what junk I shove into the outside


Finished pocket onto the fabric lined and pressed before the outer shell of the bag is sewn up.

Using my Teflon foot I am now top stitching the leather onto the outer shell before the final construction.  I also switched to a thicker upholstery grade thread for both the upper thread and bobbin sewing it at the lowest speed to ensure the feed togs are working through all those layers evenly as well that the presser foot isn't applying too much pressure when it goes over the bumps and ridges of the seams.  Another key thing to remember is that you need to switch your needle to the appropriate fabric type, since Leather was involved I put in my Leather needle.

Here you can see how my machine is a BEAST going through the layers of leather, wool, facing, duck cloth, wool and facing again.  Especially that folded over section where the pocket makes them all doubled.  I'm proud to say my Innovis 80 didn't choke up at all. 

Here is the out shell all sewn up pocket and all.
Showing off the duck cloth lining in the larger front pockets

Now the stuffing of the foam. You have to account to make it smaller then your pattern pieces.  Since I was stuffing the foam in after instead of sewing it in there was a little math involved. My foam was 1/2" thick so I needed to cut it all at least 1/2" less which I ended up doing 1/4" on each side because I didn't want it to be too small over all and just awkwardly float.  I wanted the bag to be tightly stuffed but not wrinkled inside.  This took a couple test cuts and stuffing before I figured it out to be the 1/4" all around.

Practicing the sizes of foam before the sew up.

After getting it right I sewed three of the four sides together leaving the back open to insert the foam pieces and the final cover flap for the bag. 

Before I close up the bag I attach my little magnetic snaps for the closures.
This is the inside of the front large pocket.  If I had been careful and thought of this ahead of time I would of tripled faced the wool with another piece of duck cloth and attached them before forming the pockets so that this wouldn't show at all.  It's ok, first time to make this sort of bag and everything else is going well.  Plus you would never see that anyways. it's just an annoyance to me that might catch some papers open.

I was thoughtful enough however to do that with the flap so that there was no nasty little bracket showing on the exterior of the flap. and they closed very nicely together.

After that it was time for my last large seam on this bad boy!  I tucked my flap into the seam carefully and marked and measured everything very closely to make sure the closure would be functional and not too loose or tight.  I had to pin the foam down almost the entire seam about 1/2" below it and then also pinning the seam with a lot of difficulty.  Usually you can see both ends of the seam to it's easy to do it but when you have that extra fabric flap obscuring your view of the bottom and the foam wanting to pop out it is a hassle.  I did about 4 passes before I finally got an un-wrinkled top stitch seam that I was happy with.  Also going from corner to corner was a challenge making sure my back stitches were nearly perfect around those corners and secure.

Almost done!  I just now needed some way to carry my bag.  I made my own loop holder thingies from some scrap duck cloth. I folded them similar to a bias tape stuck in my hardware and tucked one end into the other and pressed them nice and flat.


Pinning them onto the bag was a bit of a mess.  you have the duck cloth, foam and wool to deal with and it is not for the light weight pin.  I upgraded myself to near upholstery sized pins of a longer length.  You have to be careful once again to not cause any wrinkles what so ever in your pinning on the front or back.


Now since most of the bag was complete sewing these straps on was a bit of a circus act.  I had to take off my front section to my sewing bed like you would when doing something like a set in sleeve and push my machine to the very edge of the table to give is as small a space as possible to fit into the bag and rotate while sewing the straps on.  It would be a good idea if you have clamps to clamp your machine down to the table to make sure it won't fall if you get really enthralled in the sewing (hey it nearly happened to me)

I used a stool that was luckily the right height to help support the bag up while I was sewing.

All the precarious layers and pinning

And the Final piece of the inside was this Padded pocket with velcro to hold the camera in place inside the bag.  It can very easily come out and be tossed into my normal purse to protect my precious camera on the run as well!  The pattern for this was just as annoying as the bag itself and the foam was harder to work around since it was much smaller.  Ignore the blue line on the sides, it's just mark-b-gone that I didn't wash out yet.


And VOILA!  The final Bag


Thursday, March 17, 2011

TiLT - Chicago Edition

About two weeks ago I was in Chicago for a friend's birthday but also for my best friend's bridesmaid dress fittings.  While we were there I got to relive some of the things I've missed since I moved away from that City.  This is my tribute to those things that I miss and love.

1. The Art Institute of Chicago Museum.  To most people the out entrance is what they first think of but to me the art doesn't start until you are inside the building by those stairs.  They are like the cross-ways of time for me.

2. The Armory Room at the Art Institute of Chicago.  I could spend hours upon hours in that room looking at all the intricate metal work and the way things are jointed together.

3.  Millenium Park - It's just a great park, even though it was snowing we still got in our obligatory "bean" photos.  During the summertime it is a bumping place to be with live music, shows and just gorgeous the way it connects directly to the museum now with it's bridge into the modern art wing.
.

3. China Town Dimsum at Phoenix & Bubble Tea from Joy Yee's.
Phoenix is hands down still my favorite dim sum place in the midwest.  These Crab balls are HUGE and each has their own claw.  Can't get much better then that.  Joy Yee's has the best bubble teas I've EVAH.  They use only real fruit in all their mixes none of this powder tea business.  Every time we get dim sum we have to finish it off with bubble tea at Joy Yee's.

 4. Japanese Candy Store Aji Ichiban. This one is located in the Chicago "new" China town section.  They have pretty much candy for every single taste you have including my favorites of dried mango chunks and fish jerky.  Then you have more "normal" things like lychee jellies and pop fizzes.

5. Love- in all forms with my fiancee and friends.  Nothing is better then traveling to see friends or with friends and sharing those special memories.  It was a most excellent weekend!

Wednesday, March 16, 2011

When I am bored

Or also the Worst OTD EVAH!

I was trying to get some fabrics out of the way and avoid working on my wedding dress yet again so I took all this extra poly organza stuff that I used to drape my "muslin" for my dress and turned it into a petticoat skirt.  I was cold so I continued to pile stuff on from the dryer since it was just done and still warm.  When I came up for air and to use the bathroom I looked like this.

Yes very scary..... Fiancee stopped me and laughed and I knew I had to take a picture.

In all seriousness here is a photo of the petticoat not on me making me look the fool!
Amazing what clever things you can do with some free time, lot's of organza like poly fabric, ruffle foot and a simple a-line draw sting skirt pattern. I think this took me about an hour and half to make.  the nice thing with this fabric is I didn't need to worry about finishing edges.

Currently I am back on track with my wedding dress and blogging.  I took a small Hiatus with traveling this past weekend for a family funeral.  We went last minute up to Toronto Friday and came back Sunday.  It gave me a good reminder to check up on some friends I've missed because I've been so busy.  Today I wrote the last of my e.mails and snail mails.  I've also gotten quite a bit of new sewing projects done.  I'll have updates next week with some new blog content.  For now just laugh and giggle and my photos.

Tomorrow's TiLT will be a Chicago Special from my trip 2 weeks ago.  Cheers!

Thursday, March 10, 2011

Laser Cutting

 In Columbus we are fortunate enough to have this wonderful workshop called the Columbus Idea Foundry.  Basically it is a metal and wood workshop where members pay a monthly fee to use the space and the equipment.  Some of the equipment of course costs more due to consumables used such as welding, laser cutter and so on.

I took the esteemed Laser Cutting Class on the 60 W Epilog laser cutter with a 12″x24″ bed  by Paul.  It was probably some of the best $25 I have spent in a long time.
These are some examples of what it can cut, plexi glass with etching, leather, wood.  All these materials can be at the maximum thickness of 1/2".  The only things that this will not cut are Metal and PVC.  

This is the machine opened up
Below is a full photo to show you the scale. It really wasn't as big as I thought it would be but still impressive.

This is Paul explaining the rotary attachment that makes it possible to do the etching and cutting on circular objects, such as tubes and drinking glasses.

This was one of the optional beds to put under your materials as you are cutting.  I love how it has a history where you can see the shapes from the things that other people have cut into it.

This is just before the start up.  You can see that tiny red dot is where the laser will be cutting at.

Here is the best photo I could take of the laser at work.  Since it is cutting plexi glass is it burning off this fine plastic powder.  It is all enclosed in a case with a vacum sucking up the air and dust particles so when it is running you don't need to keep a mask on.

This is some plywood that was repeatedly cut.  You can see the scorch marks from the Laser.  Essentially you are rapidly burning through whatever material so you will get a burning smell and sometimes small sparks and flashes depending on the material that you are using.  Since the laser is so precise you can cut super to close previous cut marks without worrying about the material making a bend or distorting it.  Imagine how a craft punch can do the same shape over and over and all the way to the edge of the paper as long as there is room.  That is just how close the laser cutting can be for these projects.

These were two sample cuts out of thick leather about 1/4"  Seeing this made me smile and instantly I was all about the possibilities for fabrication with this machine.  I will be coming back with some samples of different fabrics to add to their tester community chart.  I can't wait to see what it can do to my silk organza and micro super mesh spandex.  Apparently there is a company in Columbus that does large sized laser cutting of fabrics called Laser Cut Fabric (surprised?).  They actually did a lot of work with NYFW designers and that right there is darn tooting special and good mark on the C-Bus map for me!  You can Check out their Article on laser cut dresses for Zak Posen here.

Wednesday, March 09, 2011

In my world today

There hasn't been a lot of personal stuff on the blog lately because a lot of it is hush hush or I'm so cussing busy that I can't see straight therefore I don't want to talk about it.

Well today I am going to talk a little bit about what I can.
We are currently on week # 2 of fostering this darling kitten.  She came to us as Fluffy and we have since re-named her Miss Rambo Fluffington the 1st or Rambo for short.  The Fiancee could not endure her to have a sweet pretty name so he chose Rambo, we just needed a more formal title to get along with the rest of the family.

Our other two kitties are the wiley looking woodland creature Sir Benjamin Franklin and the always proper Orange girl Princess Sophia Loren, or Franklin & Sophie aka Stankles and Chubbs.
Suffice to say she is a keeper and we are going to officially adopt her after she is fixed.

I am amidst another semester of teaching at CCAD for Pattern Drafting and Construction.  It is going well but I was in a bit of a funk at the beginning.  I think the break from winter accompanied by all the wedding planning was making me feel bogged down and not mentally prepared for this semester but I am totally on board now mentally and things are wonderful.  The summer CE classes for Pattern Drafting and Construction as well as my Draping into Pattern class are now open here if you want to apply!  Also this summer I am doing the High School 10-12 grade work shop and College Preview once again.  College Preview is probably one of my favorite programs to be a teacher in at CCAD.

I have been working on writing my testimonial for a international sewing machine company and there are several other exciting projects that may come from them as well.  I've already been talking to a company rep so it's another great thing in the works.  Once it's official you can expect a ton of awesome things.

I have some repeat client work gearing up for spring/summer.  Along with new client projects and work which is very hush hush right now ( I know it's sooo boring when I say Hush Hush but it just means it'll be that much better when I can talk about it).

Oh and I am going to be a guest lecture/workshop teacher for a local Private High School on Fashion design and the Pattern drafting process.  We are just sorting out the details.

I will have a great review about a Class I took at the Columbus Idea Foundry this week on Laser Cutting so look forward to it!

I am currently avoiding my wedding planning again...... perhaps later this week I will get back on board but I have a Jacket for a friend to finish.  It's a variation off of my Fencer Jacket.

Tuesday, March 08, 2011

Stripey Drapes

I love winter but this is going on a bit too long.  I am having to get more and  more inventive with my layering that I can wear something besides sweaters.  I'll be darn glad when I can wear skirts without leggings or stockings.  Currently it is just too cold when we were in the single digits.

Pulling out some of my favorite shirts I'm forcing myself to wear them in some way shape or form.  This idea came about from wearing my Gaultier Dress the other week.  It's a good exercise in styling and being creative. Some days it works some days it doesn't but that's how you learn what looks good on you.  I have this crazy shopping routine where I try on anything that even slightly peeks my interest in colors, cut, style.  I even try on things that I think are hideous. This way I can either confirm or surprise myself.  You never know what clothes looks like until you put it on.  When I was in retail I loved being in the fitting rooms and personal shopping because then I could do the same thing to other people and usually they were pleasantly surprised that they could pull off outfits out of their norm.

Black mock turtle neck - Express
Shark toothed drape stripe shirt - Express
Black Lace Skirt - UO
Grey ribbed tights - American apparel
Grey slouch fringe boots - Steve Madden
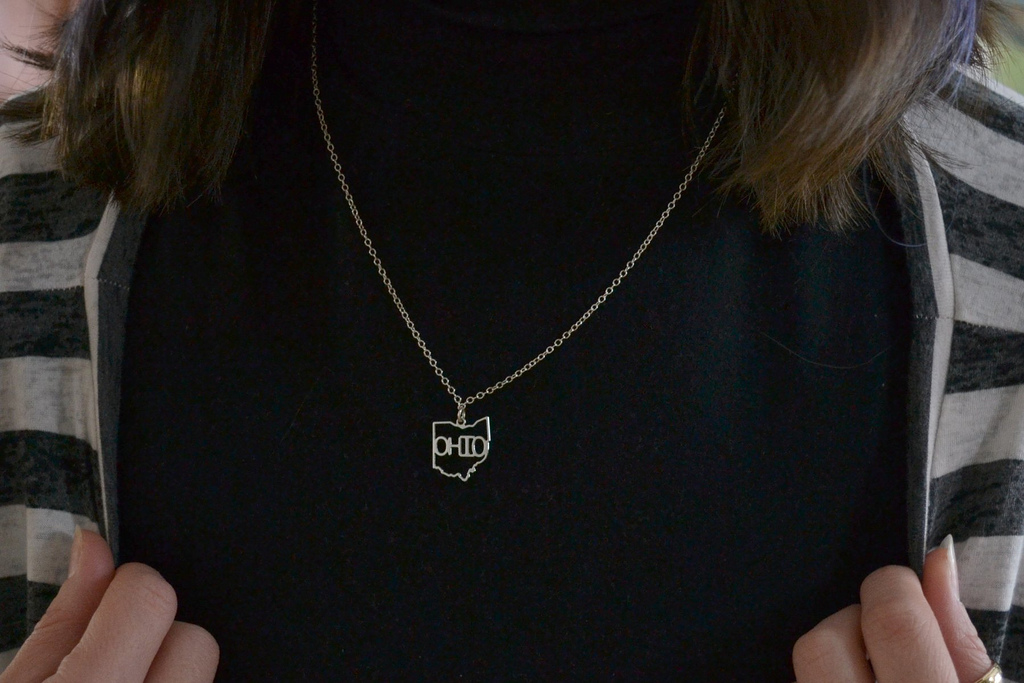
Ohio Necklace - Tiger Tree