Wednesday, June 08, 2011

Midwest Craft Caucus

 It was a great event.  One that I wish I could of been a part of the entire time but even going for just the Sunday portion was a great experience.  Olivera of Wholly Craft was the main organizer of this event and it came together great.  We had such a huge list of speakers and panels leaders.
 We got to hear from Danielle a representative for Etsy about the great conglomerate and how it started, where it's going and what changes are happening.  It was also wonderful for everyone to get a chance and ask her in depth questions regarding, sales, listings, business practices etc.

Other Great Panels provided information on hiring interns/employees, small business legals, how to take better stock photos, booth set up and presentation for craft shows and events, keeping relations with current and making new customers and those are just to name a few.
 Each panel was packed with a lot of eager people to learn as well as seasoned crafters to put their knowledge out to the collective.  A lot of great conversations were started as well as new friendships and connections.  Some of the key panels that I think were especially helpful were about pricing your work, how to apply for craft shows and inquire why did not get in with grace, also how to get published

Craftin' Outlaws Showcase Showdown!
This was Saturday night after the first day of the Caucus.  We had a mini craft show with the Craft Corner Deathmatch as the highlight of the evening.  We had a great turn out and it helped that it was near tornado weather outside so people got to be stuck indoors drinking more free beer and shopping around while they waited it out. 

I shared a table with my friend Laura Stith of Creux Poche who does these cute reversible fabric bowls.

Some close- ups of a few of my wares that I brought out..  it is hard to be a knitter and sell for these warm months so I have evolved myself into some knit accessories such as my Cat's Band yarn Guards, then my Sewing Pincushion rings and just cute Kanashi type hair pins that I enjoy making.

Here's AmyD Sporting the Craft Corner Deathmatch Champion Belt before the real show begins!
The judges seriously deliberating and trash talking as the teams work hard on their crafts all for the Glory of an Original Flamestitch champion belt.  It was great times and I made out better then I expected for this first time event.  I'm excited to apply for Craftin' Outlaws.  If I get in this will be my 3rd year with them.  
I've also just released the applications for Independents day 2011 also so I'll be busy with that.  I might as well commit Social Suicide because with the wedding coming up and all the sewing and DIY decorations I have I'm not going to have a social life at all.

If you would like to Apply for Craft Alley the Application can be found here!

Tuesday, June 07, 2011

My Alternative Wedding veil DIY

*This is a re-post from my To Muse On Wedding Blog*

Instead of a normal Veil if you remember I wanted a unique headpiece.  I received it in the mail a few weeks ago from the UK Etsy Seller Janine Basil.  I love her crystal encrusted versions (around $125) but I just couldn't spend that much money on it so I settled for the plain base for $25.00 and then added the crystals myself.
A lot of DIY projects are only worth it for either sentimental value or to save money.  If it is for the later like me on most things for this wedding timing is everything.  I knew that I got coupons periodically from Artbeads.com and so I bid my time waiting for those sweet savings before I made my order.

I chose 3 different colors for my crystals.  A blue that matched closely to the blue on the embroidery, a moonlight crystal and jet black rhinestones.  I decided to make it easy for myself and got the "hotfix" kind that come with a adhesive on the back already that melts and sets with an rhinestone setting heat tool.  My rhinestones were in total around $55 and the tool was about $3.00 with a coupon from Joanne's.  So I saved about $40-50 bucks doing it myself and it was fun!


Below is my finished result.  I used 2 different sized stones as well, smaller for the black outlines and larger for the fill in.  I got quite a few variants of stone sizes before settling down on what I got.  Bigger is not always the best way to go for fillers because then you lose some of the detail.  Yet I knew I didn't want to go tiny either because I would of hated myself trying to set all those stones.  Doing the smaller black size was a pain as it was.  It is nice to have the definition also of the contrast between the filler and outline stones.


Monday, June 06, 2011

I'm National

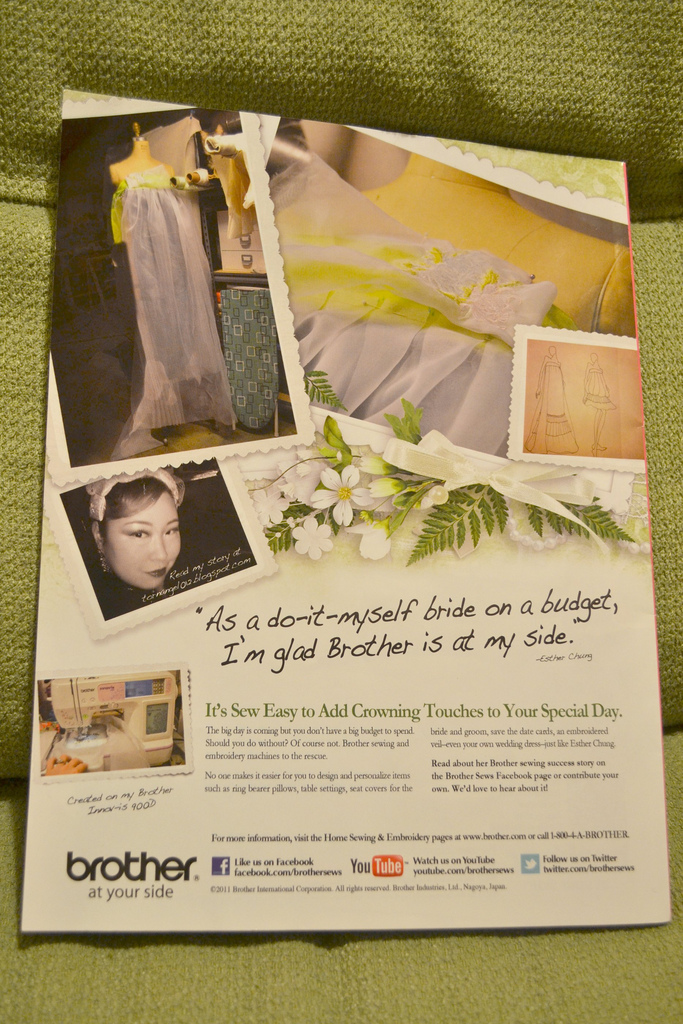
Over the past month I've been floating around nationally and didn't even realize it fully till this weekend.  I had partnered up with Brother Sewing Machines to do an advertisement for Women's Day Special on Budget Weddings.  It had been several months ago so I knew it was coming just not sure when.  While I was in Chicago a friend told me a friend of theirs saw the advertisement.  I was super excited but hadn't the time to go grab one.  Finally on Thursday I grabbed myself and copy while sickly and running errands.  I knew it was going to be in there but didn't realize where.

 BAM! 
Full Back cover baby! How exciting is that?  Also over the weekend I got the sweetest e.mail from a Half Korean American girl telling me that I was her Hero.  It was really touching and I am going to find the time to reply back to her because I really want to discuss and answer all her questions.  It makes me so happy to know that I am helping another person realize their dreams and the potential there is out there to create.
This magazine is still available on news stands and magazine section of bookstores and grocery stores.  The quote is a bit cheesy but it's an advertisement, what can you expect?  I'm still super happy and super fortunate to be given this opportunity.  Just another notch on the belt towards better things.

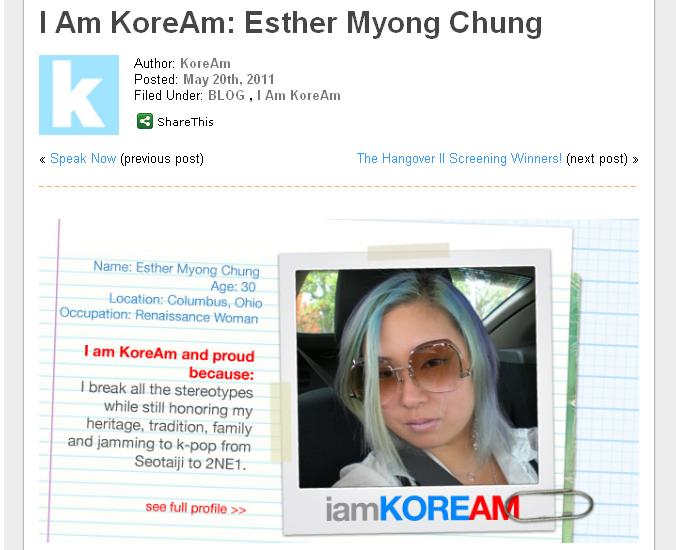
My little interview with Koream magazine for the featured "I am Koream because..." was posted as well. Click on the link to see the full article.  Filling that out I never felt more Korean in my life, it was a weird experience to sit and deeply think about my culture and how it has influenced my life growing up as a Korean American.

Weekend Bliss

Despite still being sick and an unfortunate monthly visit from "Aunt Irma" I had a great weekend.  Very jam packed busy but also productive.
Friday after work I went through the process of going back to my natural hair color - bluish green.  It took about 3 hours.  For Asian hair my hair dyes remarkably well.  Actually for any hair it dyes really well.  The first step was going blonde.  That process usually takes people 2-3 processes to get it to go this light but for me it only takes once during a one hour process.

It is still a little brassy for about 3-4 inches where I used this one dye then the remaining  was as blonde as my roots, but it's all going to be covered over again so I'm not that worried.  Having hair the color of skittles is an ongoing process and the first dye out is always not as good as you hoped.  Fresh hair at the roots will always seem to give you the best color.

Under the Dryer for the blue/green.  I sat there for another 20 mins and the rest of the time was just applying the bleach, rinse & shampoo, then applying the dye with another rinse & shampoo followed by being blown out.  My stylist is Stephanie Mahone and she is FANTASTIC! 

  My Final Result when I was shopping in Target!  It's a little more green then I would like but like I said it's a process.  The next time we'll add some blue and I might go for a sweet baby blue layer as well that I saw this nifty Crafter at the Midwest Craft Caucus had in her hair.

Also that weekend my middle brother announced his Engagement finally.  There unfortunately was not much of a story to share.  They were in Florida went out for a nice dinner and he proposed (not even on one knee).  I like to akin my brother with Buster from "Arrested Development".  Always going to the beat of a separate drummer then the rest of the family, also quiet and in his own world apart from ours.  One the way back my oldest brother forced us to stop at the Outlet malls at Jeffersonville which are always great but not when it is 95 degrees outside wearing a dark blue maxi dress and gold chunky platform heels.

I did however pick up my first Coach bag!  I'm not huge into labels but this style of Coach bag I had my eyes on since it came out several years ago.  I would of liked it in a baby blue color but my choices were slim being at the outlet.  Originally a $358.00 bag I got for $141.00.  This is also my first grown up purse to own!  I named her Stella.  She is gorgeous and everything I wanted in a grown up bag.

Since we were forced to endure the ungodly heat and my feet were still sore from the Wedding shenanigans of my best friend I had to stop and buy some cheap flip flops.  At least they had Jolly Roger's that was their one redeeming quality and surprisingly at J.crew.

There was also the Midwest Craft Caucus this weekend but that deserves it's own post as well as my National Advertisement with Brother Sewing machines!

Friday, June 03, 2011

Another Chicago Day

Chicago's weather threw me for a loop (ha ha get it? Chicago, Loop).  Anyways I thought it would be toasty hot there but turned out to be quite chilly.  Luckily I over packed and so I wore layers upon layers to keep my wee self warm.  On my way to Chicago I actually turned back about 15 minutes onto the highway to go back and get this Navy Cardigan and am I ever glad I did!

This is what I was initially going to wear then I walked outside.
And then I came back in and put on some pants.
Navy Cardigan from Anthropologie
Knot Heart belt from UO
RVCA Storm dress from Karmaloop
Grey American Apparel tank dress
Express Re-Rock Bootcut jeans
Sam Edelman gladiator Sandals
Turquoise stone ring from Anthropologie
Strawberry (Ichigo) Head necklace from Hazel by Haoshi


My Friend took me to some of her favorite spots in Chicago such as this Cereal Bar/Seafood restaurant.


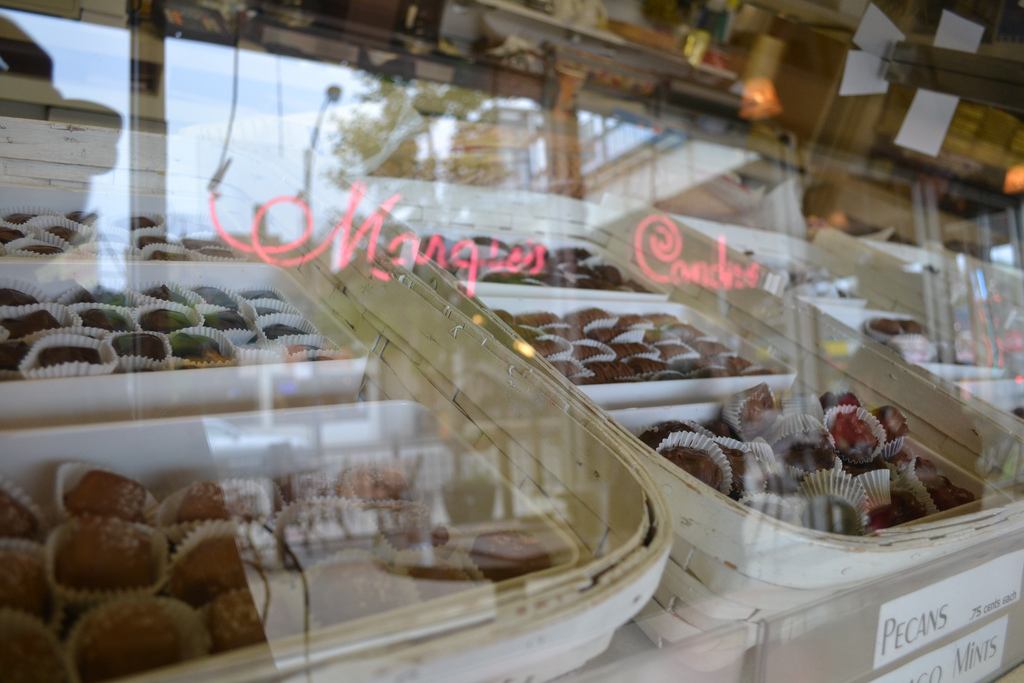
Then to the Margie's Candies


My one request for this trip was to hit Kuma Corner!

A most delicious burger as big as my face!
I got the "Lair of the Minotaur"
Caramelized Onions, Pancetta, Brie, Bourbon Soaked Pears

Thursday, June 02, 2011

Pleater Board DIY

Not all of us have the good fortune to have or know how to effectively use this glorious pleat machine aka smocking machine to make pleats.  As much as I dearly wanted one It was just not practical for the pleats I needed to make for my wedding dress.  I still wanted them to be pristine and even.  Then a friend suggested using a pleat board and DING DING DING we had a winner.  The other wonderful thing about this Idea is that it is something that I am capable of making on my own.


Essentially for a Pleat board you are going to be making a folding series of pleats in a more heavy duty material.  I chose to use a thick sew in heavy weight Pellon interfacing with no glue on any of the sides.  You kind of have to use something that has no glue or it will completely defeat the purpose of making a Pleat board since you will be doing a lot of moving and ironing and it would get messy.
First I marked off every inch to since I wanted to make my first set of pleats 1 inch.  In hindsight if you know you are going to make small pleats do them first because you can easily take 1/2" pleat board and make 1" pleats by skipping every other pleat.
I also went overboard and decided to make 2 yards worth of each size pleat.  Once again not necessary because if you are doing a long yardage you will eventually be moving the board along either way. 
After marking the length of interfacing comes the not so fun but completely necessary part of folding the pleats and ironing them into place.  You can use pins to help you hold them in place but I tried to avoid that as much as possible since any bumps you make in the board will transfer to your fabric when you pleat it.

Personally as I do this I use my iron on the highest setting with full steam then use a ironing cloth over the pleats as they form.  If a spot is giving me difficulty I lower the steam and do a good press till it holds the shape.  Using starch to help it is useless since you will be ironing over these pleats over and over again when you pleat your own fabric.


Now that you have your Pleat board done here are some illustrations from someone else on how to use it!  Basically you wedge your fabric into the pleats and Iron it.  I like to use a metal ruler and keep it in place and iron over both the fabric and the ruler.  The metal ruler helps conduct the heat along the entire length.  I also use whatever temperature is appropriate for the fabric being pleated with a lower steam level.  As I work my way along I will pin at the beginning of the length of fabric to help keep it from sliding around.


The end result is gorgeous and even pleats.  Yes making a Peat board takes a good amount of time but once you have it this is a time saving tool that will give you great results.  For my pleats I finished the edges first with a narrow hem stitch like you see on silk scarves, this way I don't have to worry about destroying my work if I need to go back and finish the raw edges.